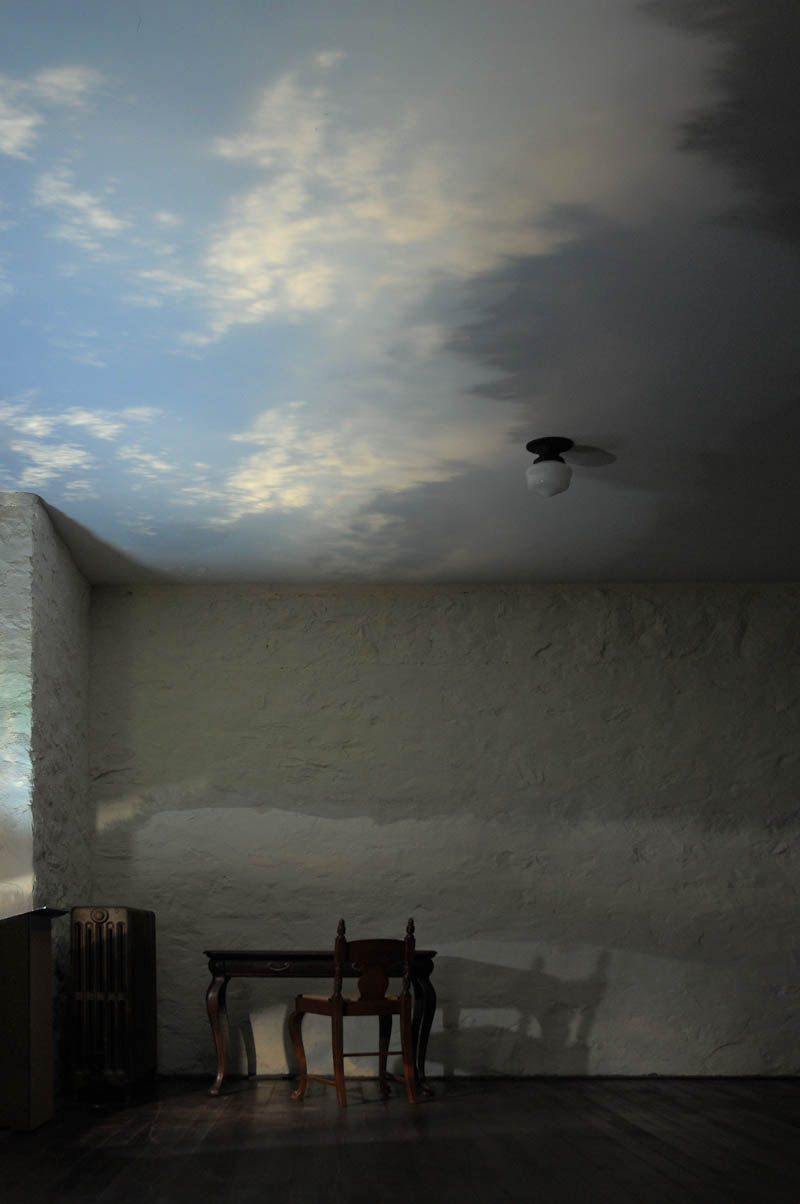
Clouds
Plans for the shoot - My plan for shoot 7 was to test out how a camera obscura would work in my parent's bedroom. It is different to rooms I have done before as it has two windows (one at each end) therefore controlling the light would be more tricky. In this shoot, I also planned to test out using mirrors to reflect where the light and consequently the landscape would go in the room.
Photographers research - In this shoot, I was influenced by both Marja Pirila and Ethan Jackon. Marja's work is reflected in mine through using a subject and showing close-ups of the landscape. Ethan's style comes from having the landscape reflect in different places such as the ceiling, this is what I tried in this shoot.
Marja Pirila Ethan Jackson
AO1 - My shoot reflects the work above as in the shoot I worked with the clouds mainly as opposed to the main landscape. I tried to make the clouds go onto my subject similar to the Marja Pirila image showing how the person is at one with their surrounding. The second photograph shows Ethan Jackson's work of having clouds on the ceiling, I tried to use the clouds in my work and direct them to different areas of the room.
Contact Sheets
Best Images
AO2 - In this shoot I used a tripod as I needed a steady base in order to carry out the long shutter speed times that I needed. By using a tripod it allowed me to exposure the camera obscura room for a decent amount of time, helping me achieve the images above. However, using a tripod did have some restrictions, especially when trying to shoot the ceiling as the camera couldn't angle that way very effectively. This caused me to shorten one of the legs and hold the tripod as still as I could in order to eliminate blur.
As for camera setting, they have been kept near enough the same throughout most of my shoots with the shutter speed being the only thing that majorly varies. In this shoot, I had an ISO 100 throughout so that my images were crisp and had no noise. I also kept the camera on F22, the largest aperture on my camera as this gave me a wide depth of field that I needed to shoot the room. Lastly there was the shutter speed, in this shoot the shutter speed was a lot shorter than the others I have done. This is due to the effectiveness of the dark room element, the room I was working with has two windows, one at either end which made it harder to cover all of the light. Therefore the room was slightly lighter than previous times. However, this wasn't an issue as I used shutter speeds varying between 5 - 20 secs depending on the angle and light coming in at that exact moment.
Editing
The images above are both edited in similar ways. The main aspects of the photographs I had to focus on were the saturation and the exposure. Below is a before and after of one of the images and how I achieved the change:
This is the original image and as you can see the exposure is slightly off, giving my subject as strange shadow around the bottom of her chin.
The first step in Photoshop was to use the NEF exclusive stage. In this I mainly focus on increasing the whites and highlights and decreasing the blacks and shadows. This helped lighten the image, bring out detail in the clouds.
Secondly, I used the exposure tool when opened into main Photoshop. This further increased the highlights helping to further reduce the shadows around my subject.
Next, I used the curves tool but changed the setting to 'blue'. This was to ensure that I was only editing the blue tones in the image, which only happens to be the clouds from the landscape. By using this tool it transformed my overall image, improving the saturation and the 'dreamy' effect of the photograph.
This is the final result and I think it has turned out really well. I like the feeling of the image and the way the subject and landscape are both of equal importance, it has a good balance to it. This end photo has also had the 'dodge' tool used around the subjects face and neck to further bring them out of the shadow.
This image has been re-edited as I felt that it was still too dark. To do this I used the exposure tool to further brighten the photo and then the burning tool to keep the detail in the clouds. I then used saturation to bring the bright blue of the sky back to the image, I feel that this worked better than the previous final edit.
AO3 & AO4 - As this is one of my last shoots in the preparatory section I feel it is one of my better ones. Despite not producing many best images from it I think the ones I have chosen are powerful and meaningful with good technique. This shoot has further helped me decide where I will be shooting in my exam as I now know which rooms work best with my camera obscura concept I feel that I have refined my technique in this shoot and am therefore ready to produce some of my final pieces.


No comments:
Post a Comment